Save time by batching similar tasks together using labels. You’ll be able to pull up a list of all tasks with any given label in a matter of seconds. You can add any labels you like, but here are a few popular ones to get started with:
- @email – Use this label to create a list of all the email tasks across all your projects so you can answer them all at once.
- @waiting – Add this label to all the tasks you’re waiting on something to get started so you won’t forget to follow up.
- @15_min – Check this label when you have an extra 15 minutes to knock out a small task or two.
Quick tip
You can add special characters, like @ , " ( ) | & or !, when naming your labels.
Add a label to a task
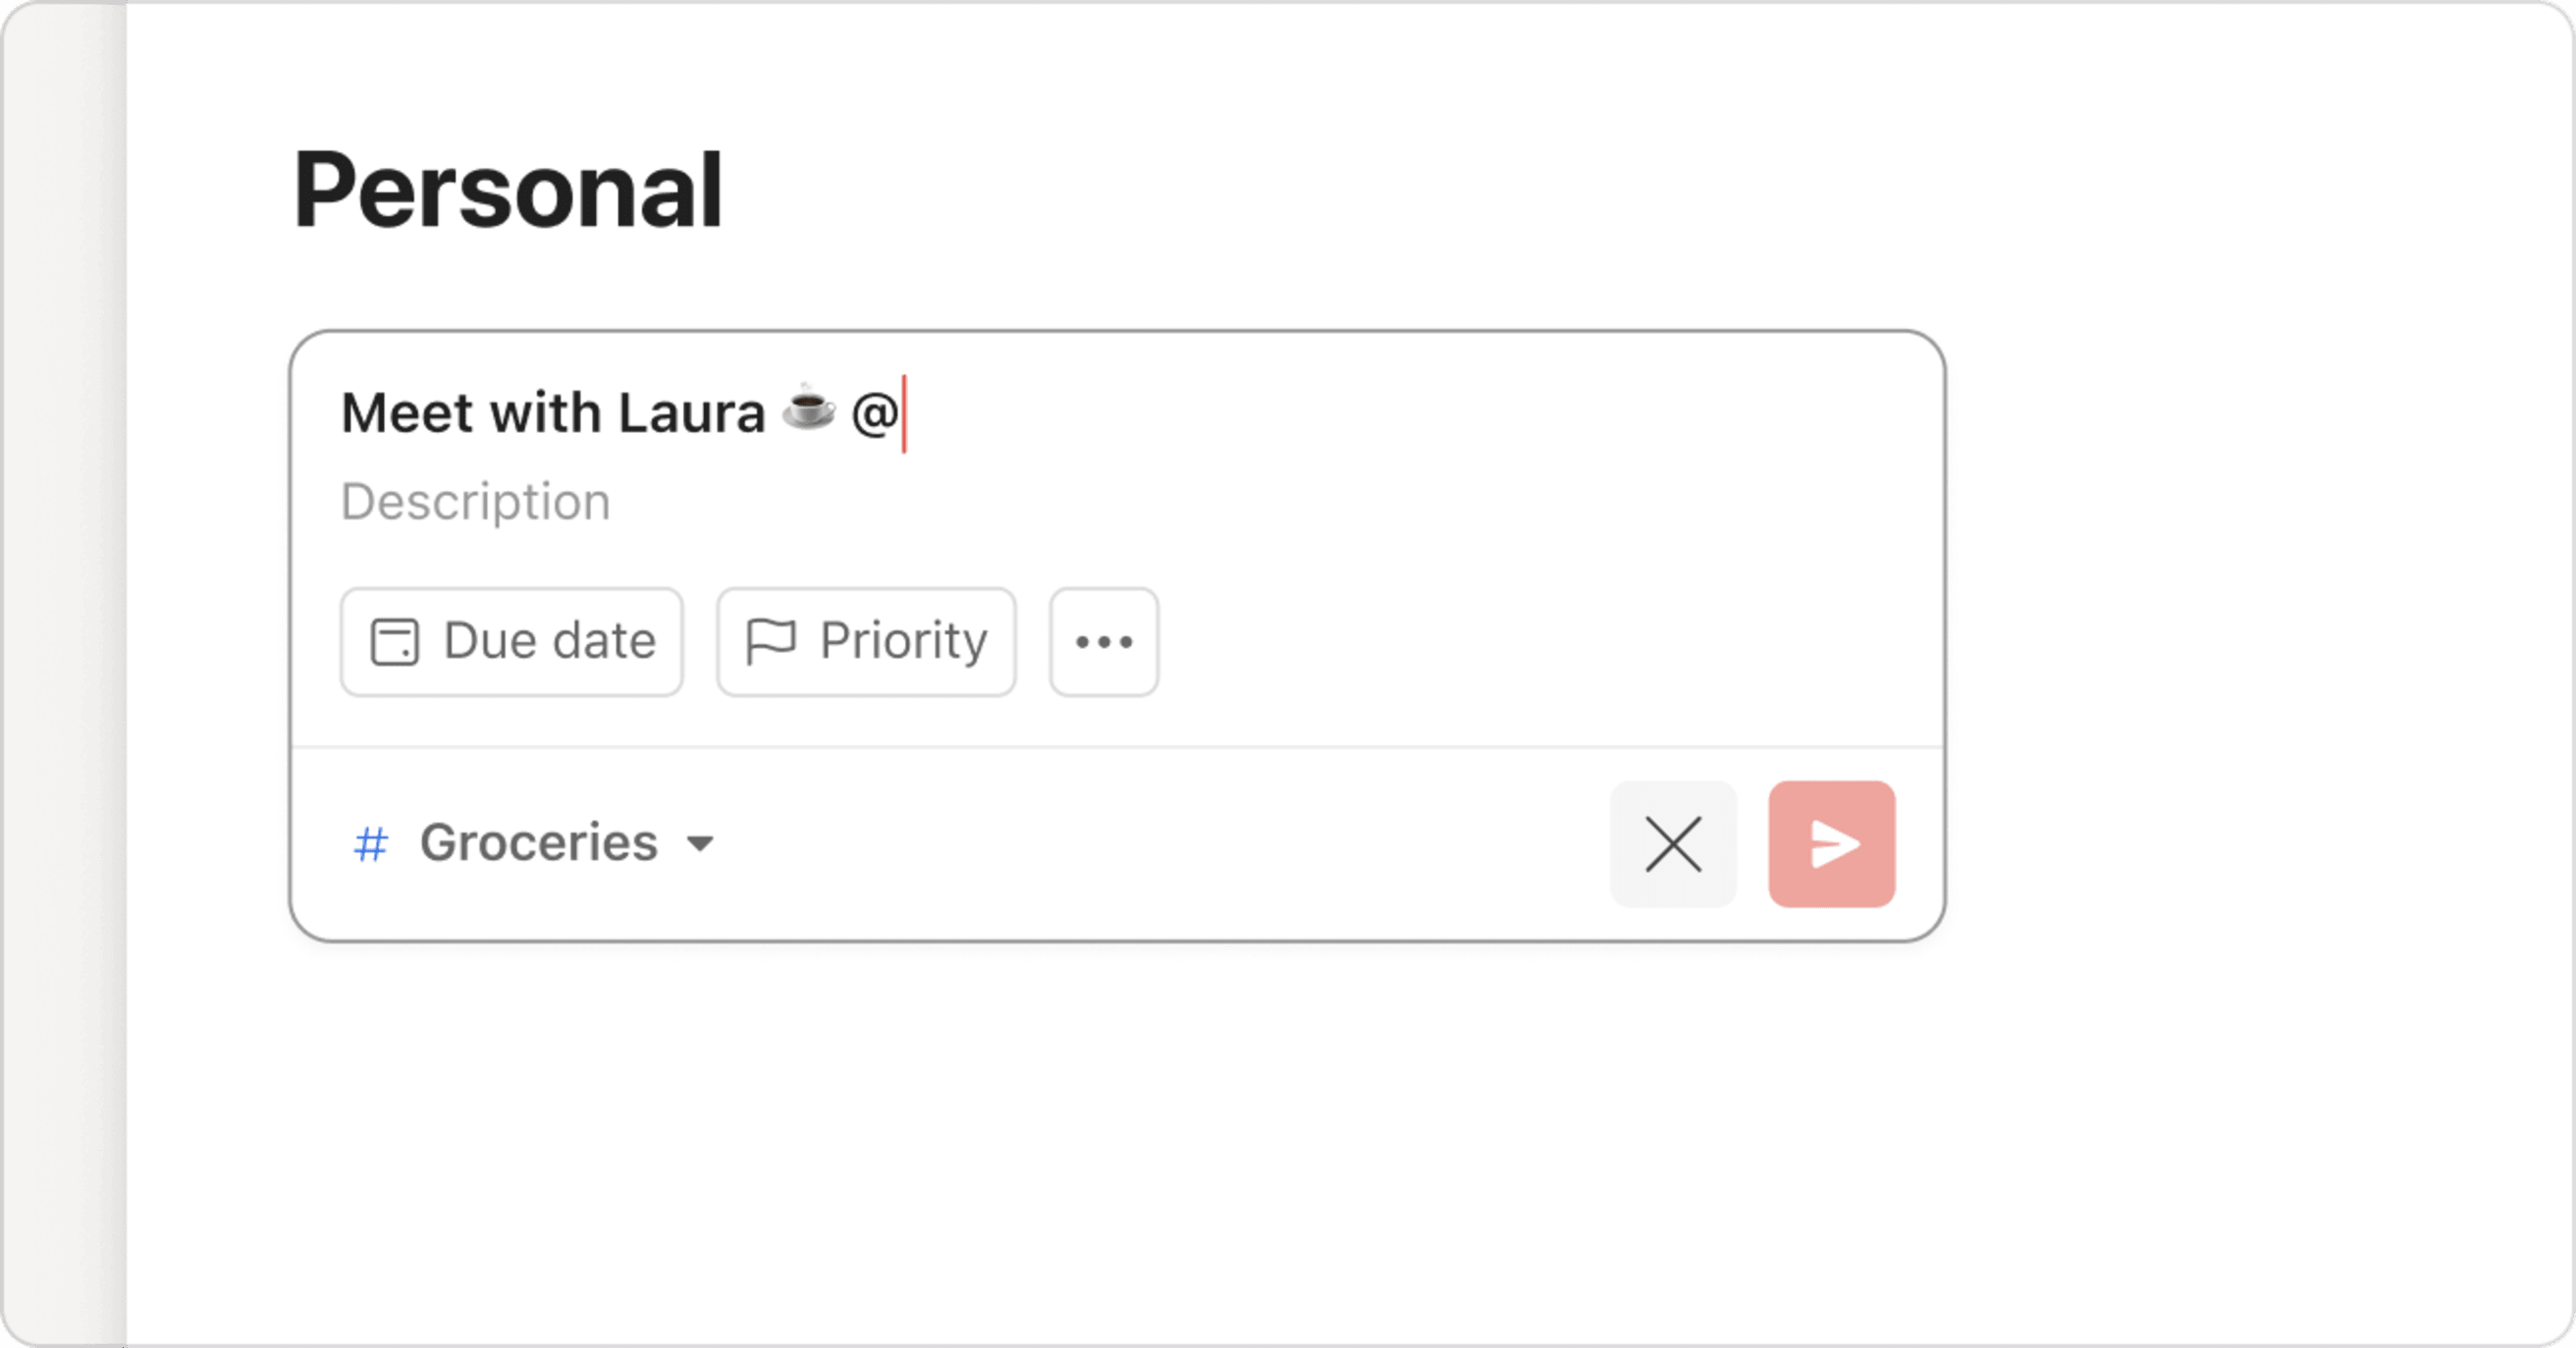
- Click the + icon to create a new task.
- Type @ into the task field (or click the label icon on the right).
- In the menu that appears, select the label(s) you want to add. Keep typing the label name to narrow down the results.
- If a label you type doesn't exist yet, you'll get an option to create it. Finish typing and click Label not found. Create Label_name.
Bulk add labels to multiple tasks:
- Click on any task to edit it.
- Type @ into the task field, or click Labels on the right-hand side.
- In the menu that appears, select the label you want to add. Keep typing the label name to narrow down the results.
- If a label you type doesn't exist yet, you'll get an option to create it. Finish typing and click Label not found. Create Label_name.
Some examples to get you inspired!
There are endless ways to use labels. Here are a few examples to inspire you:
- @5min
- @30min
- @60min
- @day
- @afternoon
- @night
- @waiting (if you’re waiting for something to happen before you can start)
- @writing
- @design
- @dev
- @25_percent
- @50_percent
- @75_percent
- @home
- @personal
- @work
- @office
- @house
- @gym
Edit a label
Change the name or color of a label.
- Click Filters & Labels in the sidebar.
- In the Labels section, click the label.
- Click the three dots icon to the right of the label.
- Select Edit label.
- Enter a new label name or click the Label color menu to choose a different color.
- Click Save to confirm.
Find a label
There are two ways to find a label in Todoist:
- Search for a label using the Todoist search bar
- View all labels in the Filters & Labels view
Search for a label
Click the Todoist search bar or use the Fkeyboard shortcut. Type the @ symbol in the search bar to see a full list of personal and shared labels.
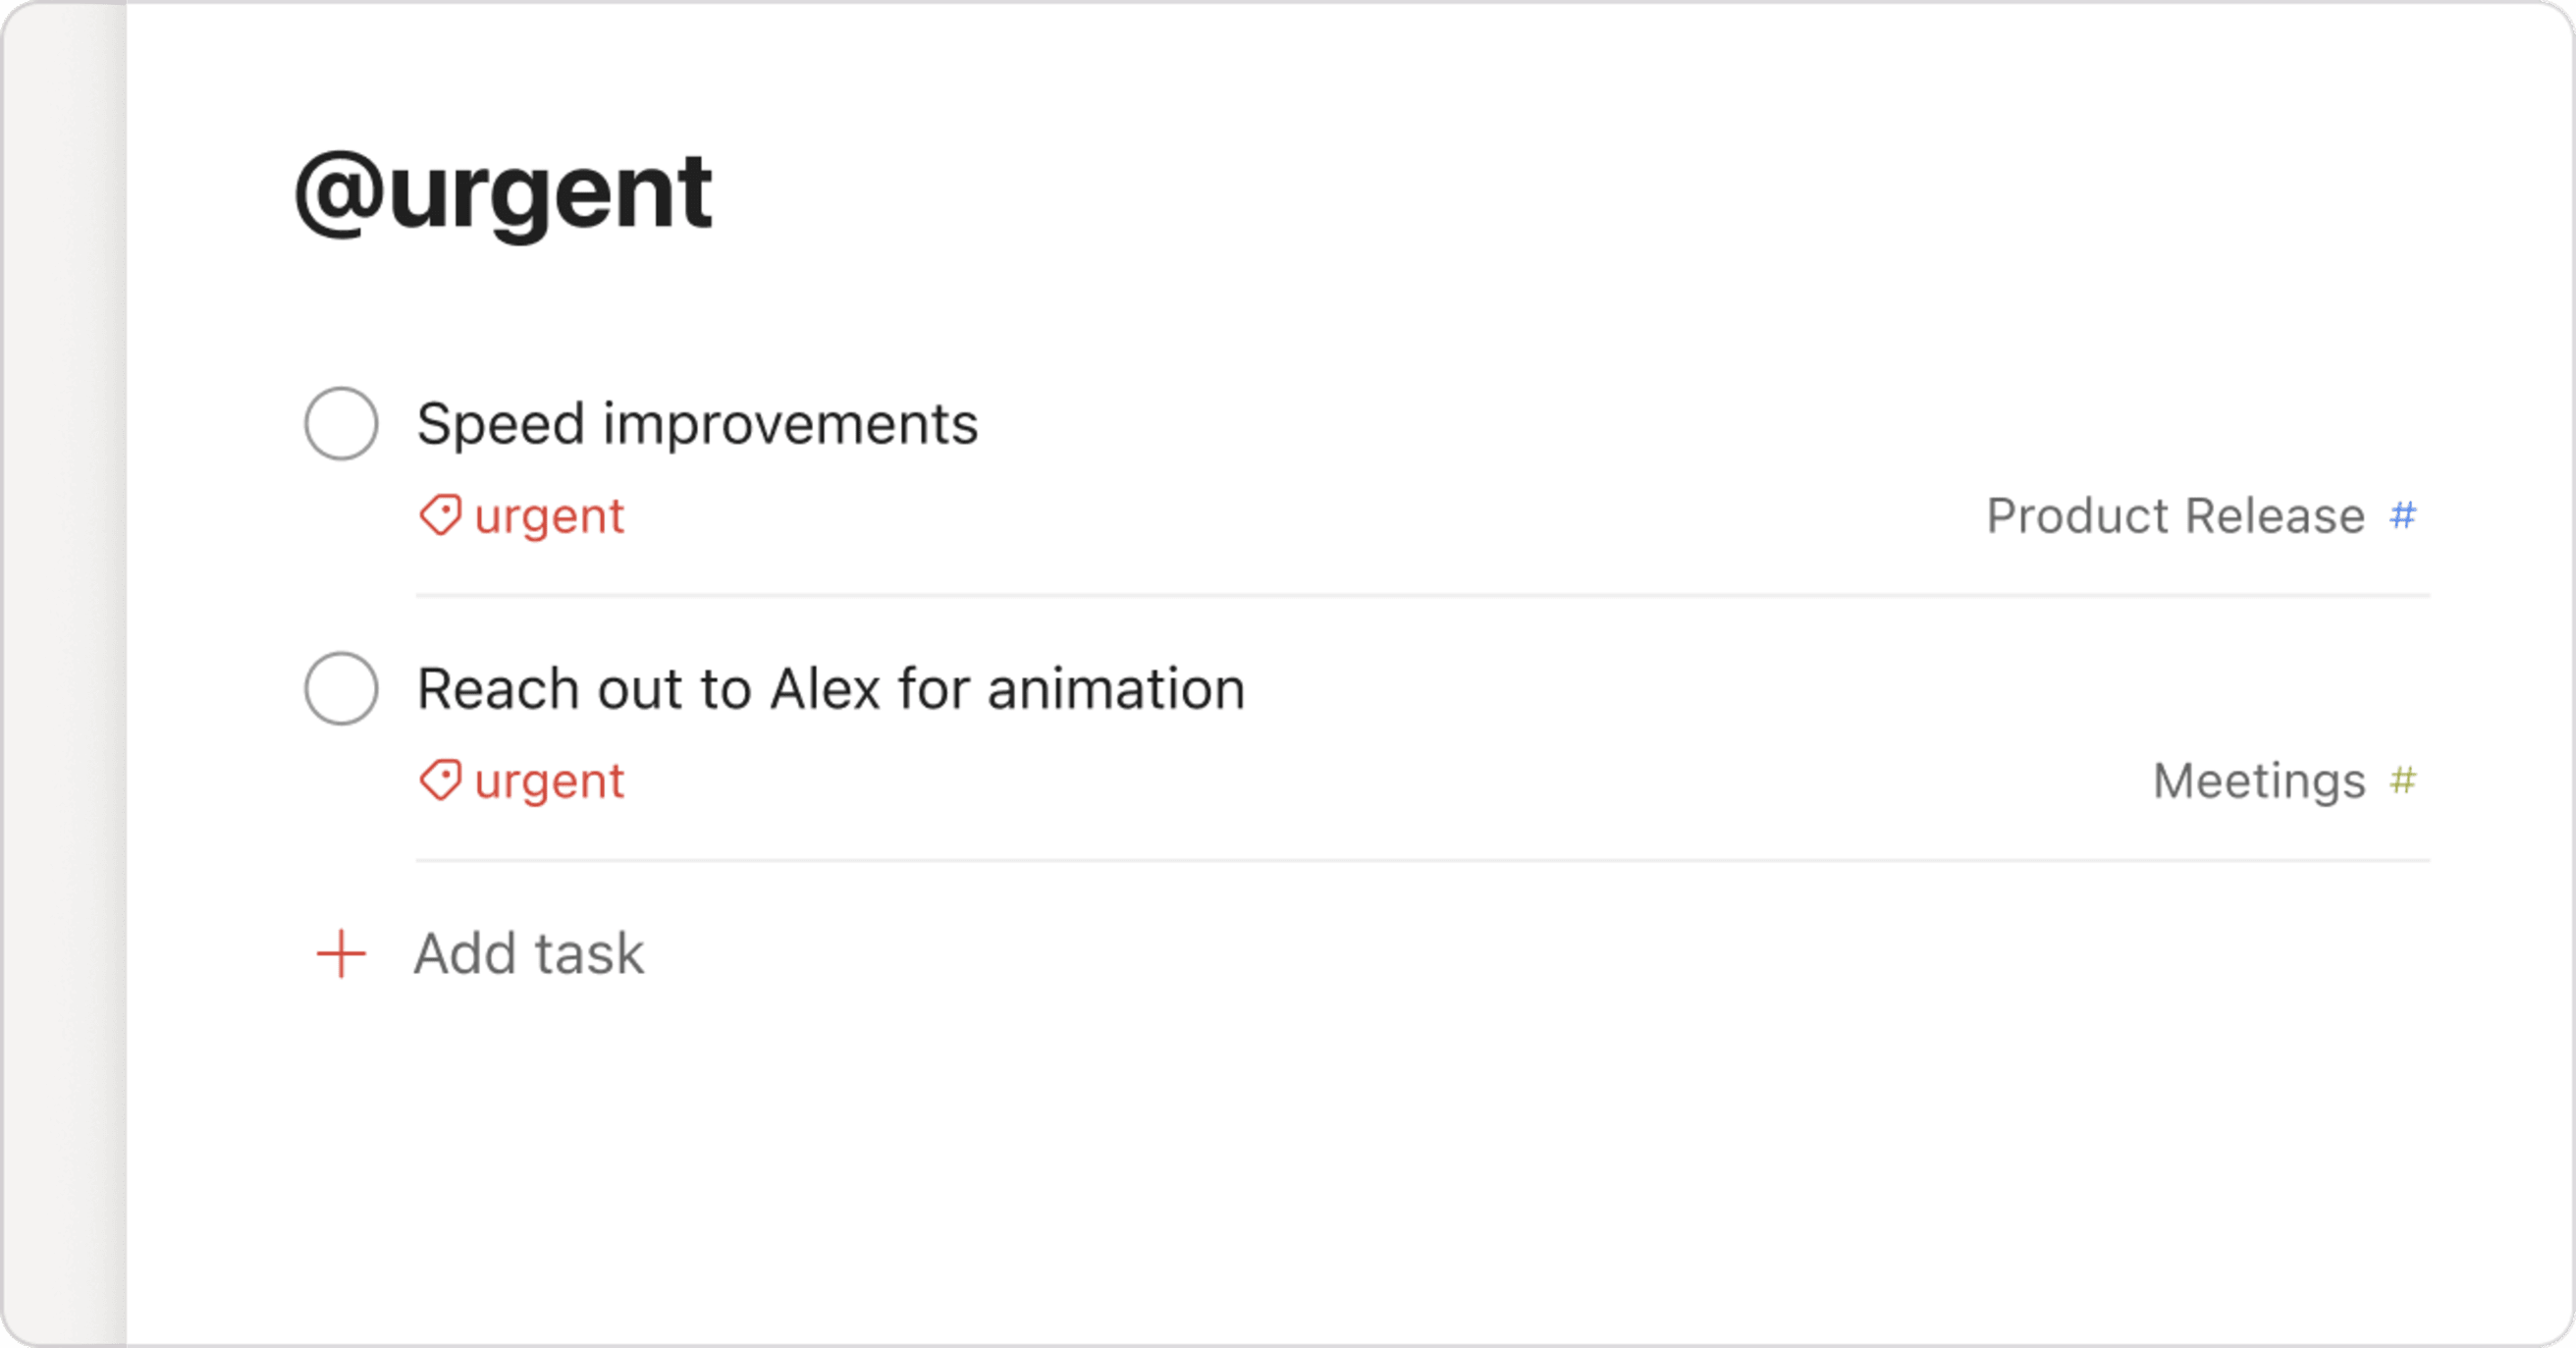
Click a label from the search results to see all tasks with that specific label.
For example, select @urgent from the search results to find all the tasks with the label @urgent.
View all labels
Click Filters & Labels in the sidebar. Scroll down to the Labels section to view a full list of personal or shared labels.
Select a label from the list to see all tasks with this label.
Use personal and shared labels
To keep your label list organized, there are two different types of labels:
- Personal labels are the labels you use and have created yourself. These labels can have any of the available colors and will stay on your list unless you delete them or remove them from your personal label list.
- Shared labels are the labels team members have created and use in shared projects. These labels will be gray by default and will only stay in the shared list if there are any active tasks with this label in a shared project.
Warning
Labels moved to the shared list will disappear if there are no active tasks with the label on them.
If you no longer want to use a label in private projects but still want to keep using it on active tasks in shared projects, you can move it to the shared list at any time.
- Right-click on the label you wish to turn into a shared label.
- Select Move to shared labels.
If you want to use a shared label in private projects, you can move it to your personal label list at any time.
- Right-click on the label you wish to turn into a personal label.
- Select Move to personal labels.
Delete a label
Every now and then you may come across a label on your list that you no longer need. No problem, you can simply delete it! Here's how:
- Select Filters & Labels in the left-hand menu in Todoist.
- Scroll down to Labels.
- Find the label you want to delete.
- Click the three dots icon beside the label.
- Select Delete label.
- Click Delete to confirm.
FAQ
Yes, both personal and shared labels that have been deleted will still appear on completed tasks. Whenever you uncomplete a task with a label that’s been deleted, a new label will be created and added to your Shared label list, even if it was originally a personal label. This label will have the name it had when the task was completed.
When you delete a personal label it will be removed from your personal label list, the shared label list of your collaborators, and it will also be removed from all active tasks.
When deleting a shared label, it’s automatically removed from everyone’s shared label list and all active tasks. If the label was part of anyone’s personal label list, they will still have access to it and it will still show up on tasks that have the label in their private projects.
No, shared labels are gray by default. In order to change it to a color of your preference, please add it to your personal label list.
Yes, every member of the shared project is able to rename or delete a shared label. The changes will apply to all of the active tasks containing that label.
No, only personal labels can be rearranged.
No, it’s not possible to drag and drop labels between the personal and shared label lists.